Configure BuildNinja Agent
Set up the Agent to connect with the server, execute assigned build jobs, and report results. The agent acts as the execution node in the CI/CD process, running builds, tests, and deployment tasks as configured by the server.
Configure Agent using Installers
-
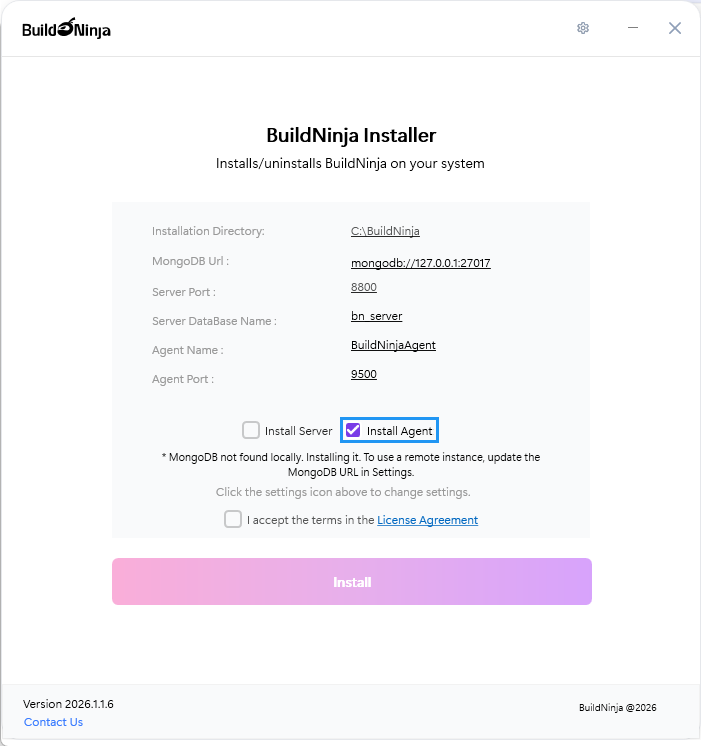
Run the unified installer and select Agent as the component to install.
-
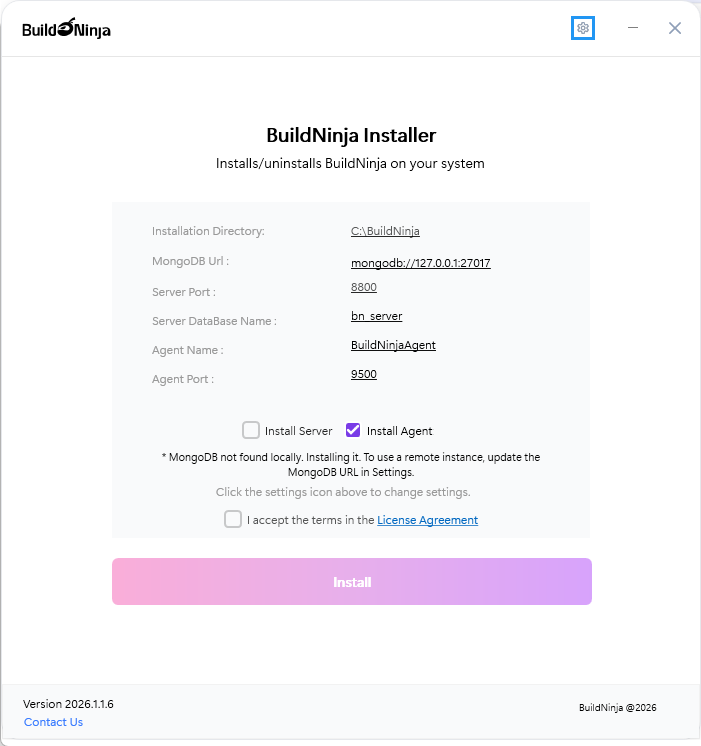
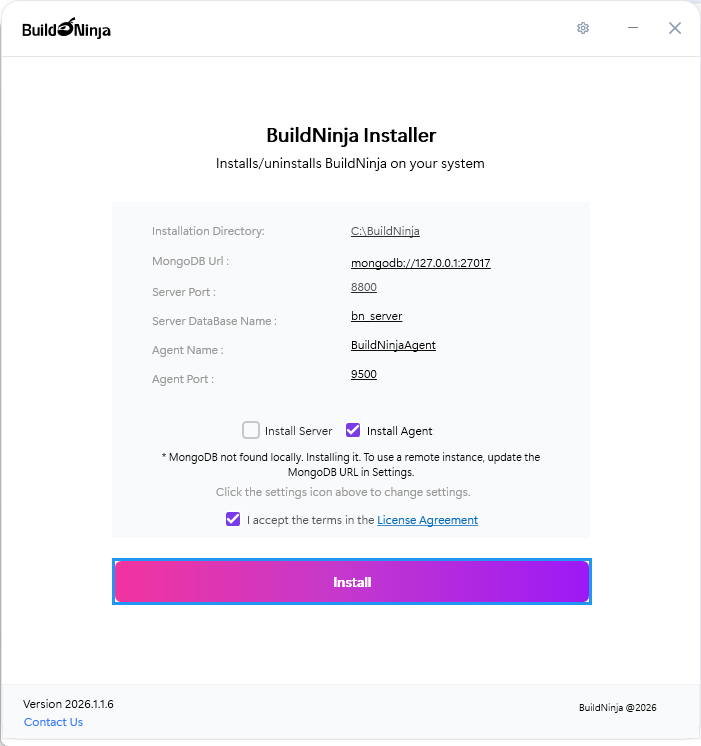
Navigate to Installation Settings.
-
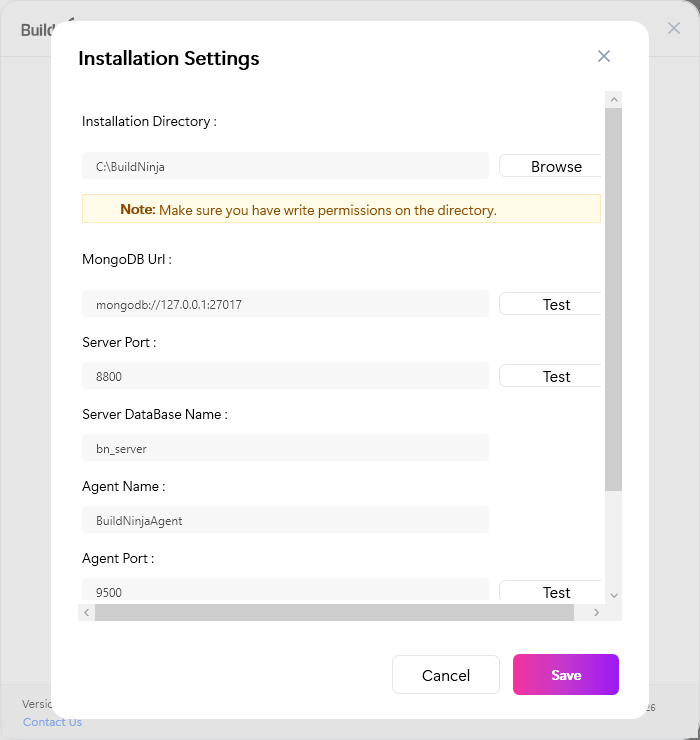
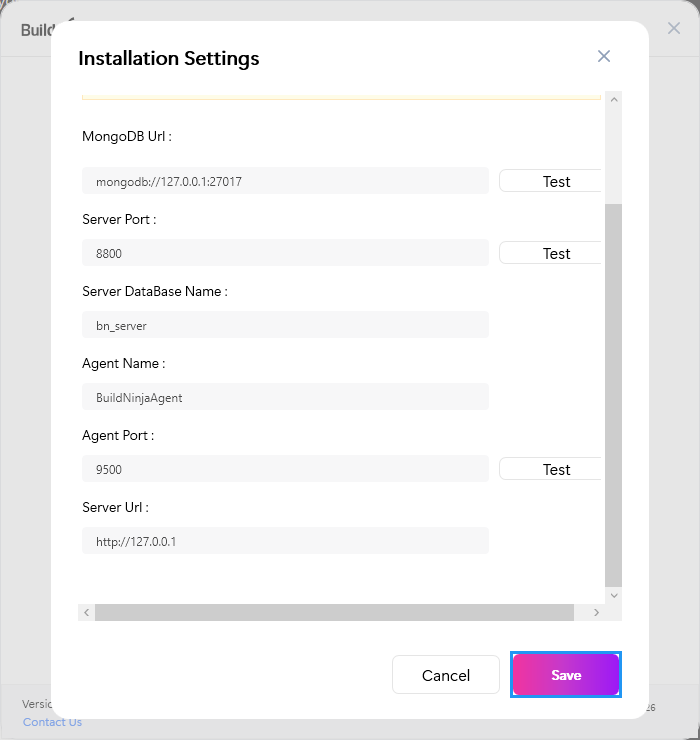
Check and update the following details as needed:
- Installation Directory: Path where the server is installed on your system. The default value is
C:\BuildNinja. - Agent Name: Name used to identify the agent. The default value is
System-NameBuildNinjaAgent. - Agent Port: Port number used by the agent. The default value is
9500. - Server Url: Address of the BuildNinja Server. The default value is
http://127.0.0.1.
- Installation Directory: Path where the server is installed on your system. The default value is
-
Click Save to save your installation settings.
-
Accept the License Agreement and click Install to start installing the application.
After successful installation, an Installation Completed message appears, and the agent automatically attempts to register itself with the server using the provided details. If the registration is successful, the server UI displays the agent in the Agents
 section.
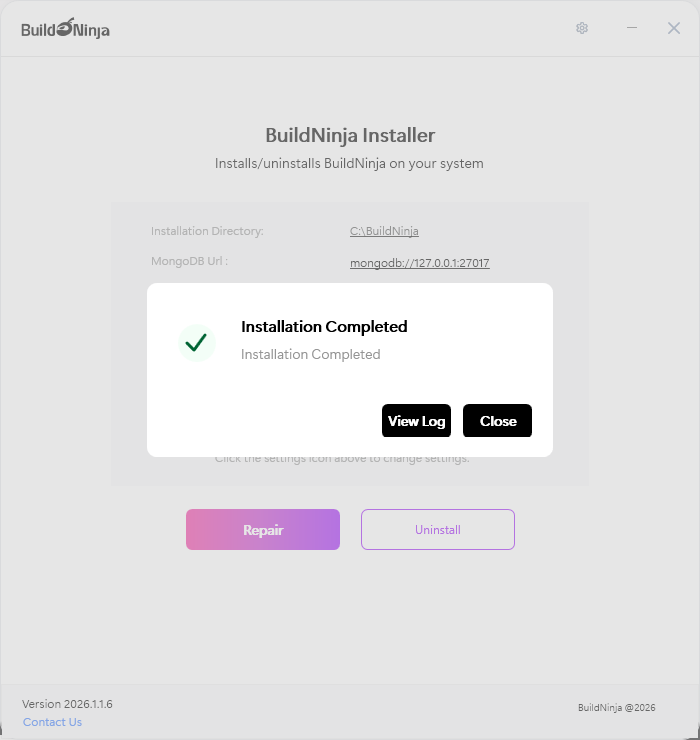
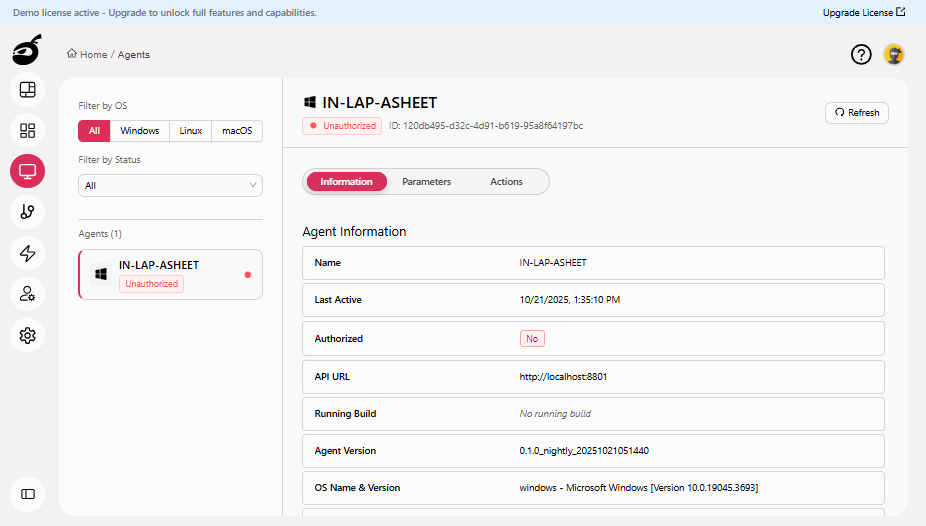 info
infoFor instructions on authorizing the agent, see Authorize AgentWhen a new agent first registers with the BuildNinja server, it appears in the Agents interface in an unauthorized state. To authorize a newly registered agent: 1..
Configure Agent using Binary Files
-
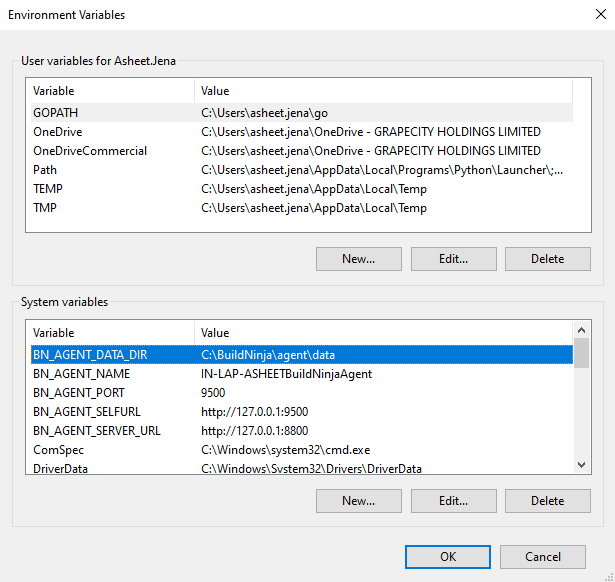
Define the environment variables that control how the agent identifies itself, communicates with the server, and stores data locally. For details on supported variables and how to set them up, see Set Up on WindowsFollow these steps to configure your environment variables on a Windows system. 1. Click Start, search for Control Panel, and open the Control Panel. 2. Navigate to System and Security → System. 3..
-
Run the
bn_agent_windows.exefile included in the package to register the agent with the server. The agent automatically attempts to register using the provided details. If registration is successful, the server UI displays the agent under the Agents section.infoFor instructions on authorizing the agent, see Authorize AgentWhen a new agent first registers with the BuildNinja server, it appears in the Agents interface in an unauthorized state. To authorize a newly registered agent: 1..